Found Type Studies
GDES-200 fall 2018 (David Ramos, American University Design)
ramos@american.edu · office hours
Find type, texture, and pattern in the environment. Envision ways of using scale, framing, and placement to create compositions. Start to develop skills in iteration, craft, and image manipulation.
Part 1: Take photos of type
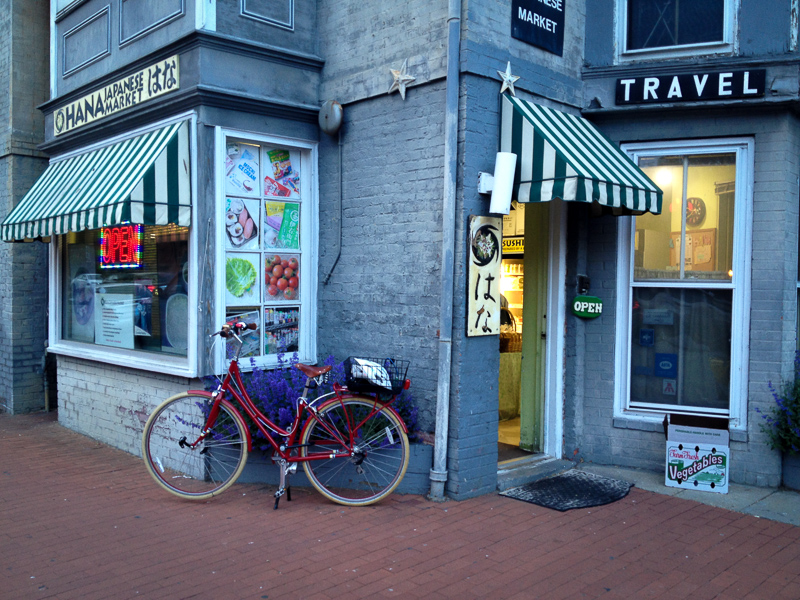
1.1 Go look around the city, bringing a camera with you. Take 15 or more photos of type and lettering in the environment. Look for letters that are permanently or semipermanently attached to their supports; no ephemera on paper, please. Find at least half of these images from off campus. (For this project, there are deadlines for all of these steps, listed on the class schedule.) Download these images and bring them to class so that you can pull them up on the screen of a lab computer.
A few guidelines for taking pictures: Get close to your subject. If you are photographing a sign, the sign should fill the frame. Use the best camera that you can readily obtain.
1.2 Bring the images into Photoshop. Convert them to black-and-white, adjust levels/curves, and save full-resolution grayscale copies in TIFF format. Print all of your images.
Keep your original image files, along with the edited files that you create. Make sure that you avoid inadvertently saving over older versions. Give your files meaningful names and group them in folders.
1.3 Think about how you could crop into and zoom into the typographic forms within your images. Go looking for details, shapes, and visual moments that might become interesting square compositions. Using a black marker or wide technical pen, draw crop boxes around these possible compositions. Choose your best three compositions.
1.4 Go back to your grayscale photos. Crop them in Photoshop, creating and create three compositions in digital form. Save your files under new names. Your compositions should be 10×10 in., 266 DPI, grayscale. Print them on 11×17 in. sheets.
Part 2: Gather textures and patterns
2.1 Go back outside with your camera. Take 15 or more photos of textures and patterns in the environment, ensuring that at least some are of natural materials. Avoid using patterns that have been intentionally designed, like printed textiles or wrapping paper. Download your photos onto a USB drive and bring them to class.
2.2 Convert the patterns to grayscale and save as different files, in TIFF format. Correct levels/curves for the files. Look at your patterns and choose ones that seem promising as backgrounds.
Part 3: Make new, layered compositions
3.1 Composite together your cropped typographic images and your chosen backgrounds. Use layers and transparency, and perhaps adjust levels/curves again. Aim to create three final compositions that combine graphic form with texture/pattern. Your final designs should also be 10×10 in., 266 DPI, grayscale; save as new files in Photoshop format.
3.2 Print and trim the three compositions. The finals should be 10×10 in. images, with a 0.5 in. border around all four sides, on 11×11 in. sheets.
3.3 Submit PDFs of your finals (see instructions on submitting work).
Camera
You will need a camera or smartphone camera for this project. The Art Department Visual Resources Center (first floor of Katzen) loans DSLRs, and there are other cameras available from the library. A smartphone camera will probably suffice, but particular care to stand close to your subject.